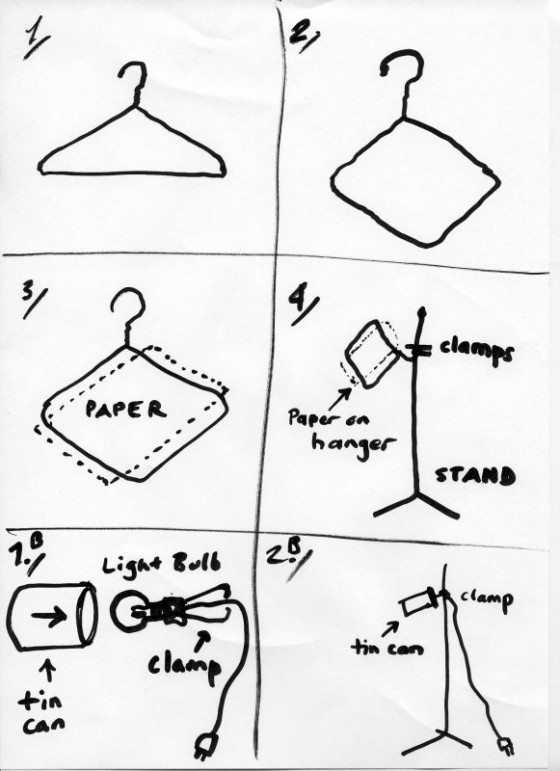
Now that you have put together some of the tools required for this first exercise, let’s do the following. Take one of the tin cans and slightly flatten one end of it so it looks more like a cats eye and place the rounded side of it over the head of the flash, making sure you don’t obscure the sensor. We can now name this coke can or what ever a “Snoot”. The longer this “Snoot” the more concentrated and pointed the light will be in a given area that you choose. Now there is a problem here. As there is no pilot light, it will be difficult to see where it is hitting. You can do a couple of things here. My favorite is, I squint my eyes and do a test flash. By squinting I can see where the flash is hitting with greater accuracy. The other option is by taking several test shots and reviewing where the light is directed. The closer to the subject the more concentrated your light will be. Find someone who would like to sit as your subject. If you wish to do a still life that will also work. Oh, one thing, I prefer that the flash is off camera and attached via a synch cable to your camera or to a synch cable adapter that will attach to the hot shoe of your camera. You will find a way of attaching the flash to one of your stands.
If you have a flash/light meter take a reading of the flash output. 1/4 power might be a good starting point, placing the flash head about 1.5 to 2 meters from the subject. If you don’t have a meter. Set up your camera in “M” mode and find a starting point of let’s say, f5.6 at 1/30 second at 100 iso. If it is too bright adjust accordingly i.e f8.0 etc. One more thing. If your snoot is casting too much light, you can always place another tin can over the can being used to make it longer. You now have the primary light. We will discuss this further in a moment. Do you have a plant or a cool sculpture or cool object lying around? This will be your secondary layer in the image. Take one of your 60-100 watt light bulb with metal clip and place another “Snoot” over it, before turning on of course. This is where the “Construction Gloves” come in to play. I don’t want you burning yourself. Once the “Snoot” has been well placed over the light and it should be at least 20 cm long (8″), place the plant or object out of the planned crop of the image i.e. to the left or right of where the subject is, but NOT seen in the view finder. Aim the light at the plant or object and cast a shadow on to the back wall. Experiment with where you wish to cast the shadow. Remember those black cardboard sheets we talked about? You will want two for this exercise. Place one on either side of your subject, but out of view in your view finder. We can call these “Scrim’s”. These will block the flash light from hitting the background and ruining the effect of the shadow cast by the secondary light.
Now let’s get back to the principal light i.e. the flash head. You might want to light the subject selectively by moving the flash closer to illuminate the upper half of the body and let it fall off to the lower half. It’s your choice. Now that you have set up the two lights, it is time to do some metering. In “M” mode read what you are getting on the secondary object. Let’s say it is f5.6 at 1/15th of a second. Now read the wall where the secondary light is hitting. Don’t read the shadow! This might be f2.0 at 1/15th of a second. Now that you have this info, it is time to adjust the principal flash hitting the main subject. This becomes a creative decision. Why, because it now becomes a proportionate lighting exercise where the more light that hits the main subject, the darker the background. Let’s try f8.0 on the subject (this is just a starting point). Ok, you have f2.0 on the back wall, f5.6 on the object casting the shadow and f8.0 on the subject. Set your shutter speed at 1/15th of a second at f8.0 and start to take some test images. If the background is too dark for your taste, reduce the flash output to f5.6 etc… You can try 1/4 to 1/60th of a second and everything in between.
Play with this for a while until you are satisfied with the outcome.
I will go further in Part 4.


