In Part 4, we were left facing the subject, we had tested the light and had to determine the difference between the foreground and background intensity. You also had to decide how much of the principal subject was going to be lit.
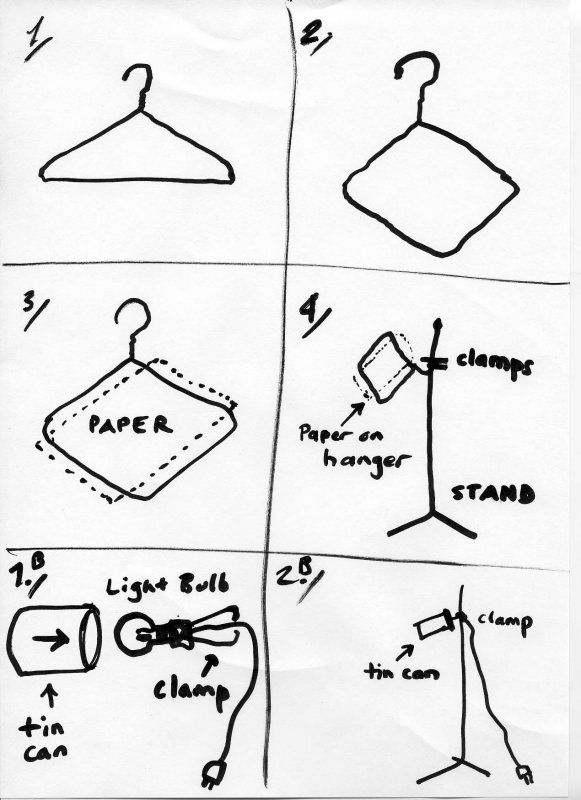
Now that you have done your test shots and are satisfied with how it looks, you can commence shooting with this very simple lighting set up. Read More
Eyes of Laura Mars I was inspired to write this short introduction to this film from 1978 starring Faye Dunaway... Read More
An interesting perspective on the world of digital retouching and the tools available from software Photoshop to hardware with the Wacom Tablet Read More
Pixel Peeping - How many pixels from your DSLR or Compact Camera do you need to produce a quality image? Read More
I have been asked on several occasions - what gear would I need to get started in fashion-beauty photography - Here are Benjamin Kanarek's advice Read More
One Post Production Technique to add Dimension to Your Flat Photos. Read More
Now that you have your light set up for the model and the reflection of the object on the background, it is time to determine the ambiance your wish to create. If you are looking for a more "Cinema Noir" look you may wish to isolate the foreground from the background by increasing the out put of the flash on the subject and letting the background go darker by another 1 to 2 stops. Read More
I will be available to answer your questions to the best of my knowledge regarding the photo business, techniques, lighting, photographic approaches and the politics of our metier. Read More
In Part one, I asked that you prepare a couple of 60 watt light bulbs a flash some modifiers, I will now add a few more elements to this... Read More
Here is a suggestion for a harder more contrasted light. Imagine you have your window open and the light is streaming in to the room. Now this will apply to direct sunlight and overcast conditions. The rendition will differ, but the technique is similar. Read More


