Today, I thought it would be the right day to write about a simple Photoshop-tool called the “History-brush” tool and how to start using it for a number of wonderful actions that improve the quality of your images. It may be Lights Shadows, Color Sharpness, Contrast Filter effects and much more.
To start with, we first open an Image in the 16 bit mode.
The trick to activating the brush, go to the “history/action” window and click on history – there you can see the history of all your actions.
You can see a little “square” to the left of action/history – click on it and a little brush appears – that means you are ready to use the tool.
This is just a simple way to start so you can begin to realize how the History-brush tool works.
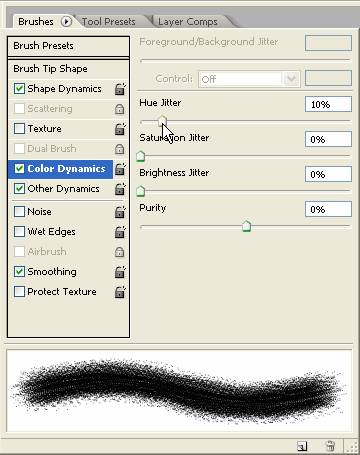
Using the soft brush, set the mode to color dodge/opacity to 10-15% and flow at 100%.
The color-dodge-mode lightens up all the light/white parts of your image and leaves the dark parts/shadows as they are.
You can turn that around by changing the mode to color burn, It works on the dark parts the same way as color-dodge on the white parts!
You can balance your shadow/highlight relations and you can choose the spots you want to lighten up or darken! It gives more graphic and very contrasting results. You can also use the tools to work on Mid-tones Highlights and Shadows.
Now we change the mode to Screen, set opacity to 50-60% and off we go. This Mode lightens up the dark parts in all the spots you go over with the brush. To make the light Areas darker you can set the mode to multiply and go on working on the light parts.
Now we change mode to exclusion and set it to 60-100% so you can find out the effect the brush has on the image. The effect is a sort of solarisation. Now we switch the mode – almost like in life – to normal opacity a 100% and you go over the image parts that you want to be “normal”, in color and contrast. Now you should see the effects of the History-brush tool by bringing out the Image parts you started with before using the exclusion mode.
You can choose the right spot by going up/ back in those little squares in the History window and the brush brings out that particular “History” of the image. Now we go back to the regular/normal image at 16 bit and transform it into a black/white image. Then we click on the square to the left in the history-window. Let’s say the 16 bit -action.
Now we have to flatten the image setting the mode to normal/100% and start to work on the parts we want the color to come back so that it leaves the rest of the image in black/white.
You can use different modes and different percentages but that changes the effects on the colors highlights shadows and so on.
We use the normal mode so we can get an unaffected image in color.
To get experience on how the History-brush tool works in different modes, you have to try out every Mode yourself and practice for quite a while.
Save them all so you can take a look at the results and ask yourself what you did and how you got there. You have to repeat those actions a couple of times!
That will help you to remember what you did and how you did it and the effect you can get with each different Mode!
The fun part is that you can use different modes on different parts of the image and combine them to get great results so you will be satisfied with your work!
Like I said in the beginning, you can also use filters like the sharpening/blur/glow filters and more to work on your image but that is another story! First you have to start to understand the principles and then go on to more advanced use. You can also use “adobepress” tutorials to learn all the tricks and there are many simply by reading them. Also, video tutorials are available on “youtube” and more. You just have to google the right question and start reading and start with that information to exercise and practice – which is the formula to an easier understanding and how to use the History-brush tool!
Thank you for reading this blog on how to use the History-brush tool.
I really hope this was helpful to you by reading this blog.
I can’t wait to start seeing results on your images!
Post written by Dietmar Kohl


